
Tower Bridge at night
Tower Bridge at night
Trying to photograph a city scape after sunset it’s a bit tricky but not impossible. Most of today’s cameras are able to capture good photos even on auto but if you want better results you will need to:
1. Decide what do you want to photograph, move closer or further, zoom in or out as necessary.
2. Make sure the camera doesn’t move when you take the picture. Use a tripod or improvise one. Use a remote control or the camera’s built in timer, 2 seconds should be enough to eliminate the vibrations that may occur after pressing the shutter.
If you follow these two simple steps your night time photography should be a lot better already.
That’s good but let’s assume you want better photos. In order to take better photographs you will need remember the steps above plus:
3. A camera with manual controls, so you can choose the ISO, Aperture (abbreviated A or Av), Shutter Speed (T or Tv). First you have to decide if you want to blur the motion or freeze the motion. Follow my thought process for the photo below:
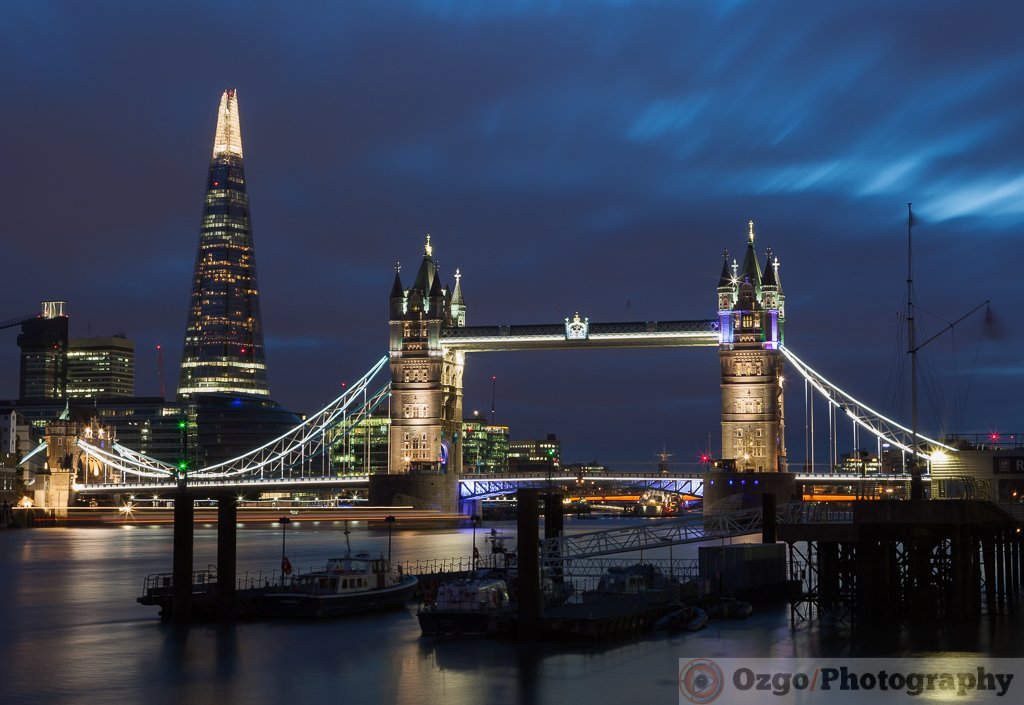
- I wanted to capture the Tower Bridge and the Shard one next to the other. From where I was located I couldn’t use a zoom lens because it wasn’t wide enough so I had to change to a wide angle lens. In this case I used a Canon 24-70mm L lens.
- With the camera (Canon 5D Mark II) on a tripod (Manfrotto 190XPROB+Ball Head) and the mirror lock up (enabled from the camera’s custom menu) – my plan was to avoid any vibrations during the exposure.
- I wanted the best quality possible and the first setting I changed was the ISO to 100.
- I wanted everything in focus and for this I choose F16. (I could have chosen F22 but some zoom lenses tend to be “softer” at the longest and shortest focal ranges, and sharpest in the middle range of the zoom).
- I wanted the water to be as smooth as possible and blurry skies and for this I choose 30 seconds.
- I zoomed in a little bit from 24mm to 51mm
- White balance wasn’t important in this instance because I was shooting RAW and I could have easily changed it in post production.
- In Lightroom I’ve made a few adjustments: WB from 4250k with -7 tint – as shot to 4150k -17 tint Custom (very similar with the original) , contrast +25, highlight -37, shadows +29, whites -64, blacks +28, Sharpening +51, enabled profile correction and removed chromatic aberrations. I’ve used the spot healing brush to get rid of some small dark spots in the sky (probably the sensor or the lens was dirty)
- Cropped to 11″5 x 16″7 inches, A3 size, in case I decide to print it in the future.
- When exporting I choose the image sizing of 1024 pixels long edge at 72 pixels per inch (resolution) and sharpened for screen.
After the third attempt I was happy with the result and ready to leave when a young girl asked me to take a photo of her and her family with the same backdrop. She handed me a compact camera and… disaster. In the first 3 photos I took the flash didn’t fire. I tried changing the settings but the menu was in German and I don’t speak German. I managed to enable the flash but the background came out underexposed. After a few good 5 minutes I gave up and asked them if I can use my own camera to take their photo. They kindly accepted. I bumped up my ISO to 3200, F 2.8, 1/30s and this is the result…

After we exchanged email addresses, she wanted another photo with me and her family but this time she used a point and shoot camera. My friend Gabriel kindly took the photo and then we packed our gear and left.
Whilst walking towards Tower Bridge we stopped to take some photos of the bridge with the sun-dial metal sculpture in the foreground. I setup my tripod and ready to take the photo when the security guy came over and stopped me taking the photo. When I asked why his reply was mind-blowing: “You can’t use the tripod to take the photo because it might drop in the holes of the pavement and break the camera then sue for damages”. He was okay with me taking photos handheld though! Just to be clear, that were no holes in the pavement and after a few attempts to stabilise my camera on various improvised tripods I decided it was way to dangerous and had real chances of dropping my camera and then had a good reason to sue them for damages.
Not far from that place I found another statue and if I’m not mistaken it’s on the same property and the same type of pavement.

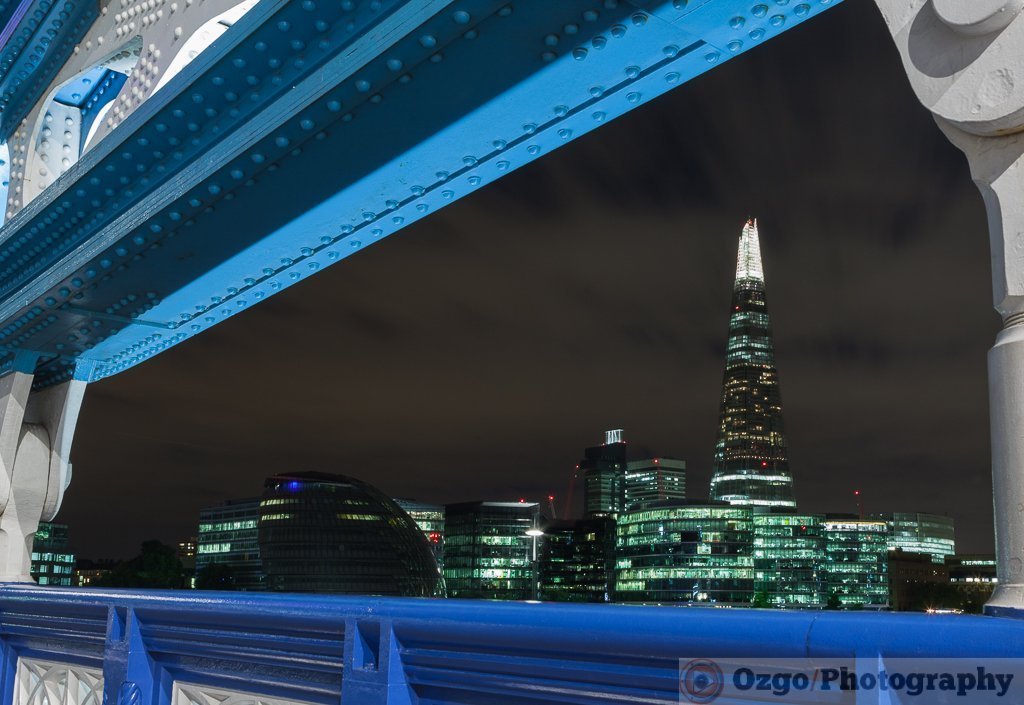
We made a short stop on the bridge from where I was able to capture this shots: a view of the Shard through the bridge’s anchors and the new Walkie Talkie Building.
Before we left I tried to take some black & white shots inspired by the shadows on the pavement.

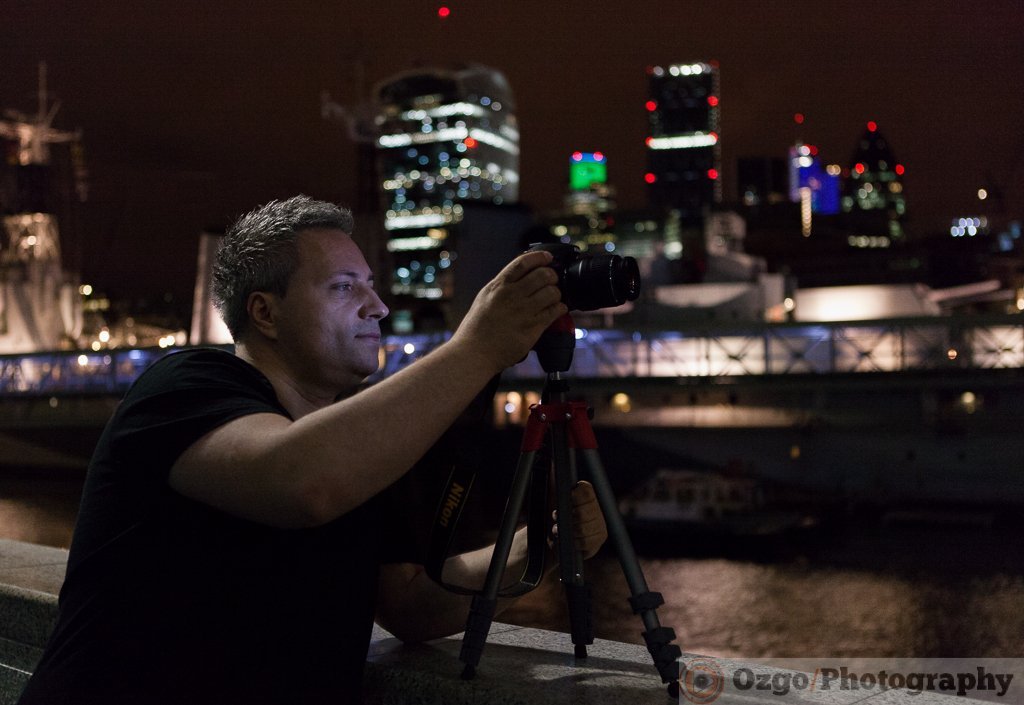
Here is Gabriel in action, check out how his face is lit by the camera’s display and the hair by the street light.
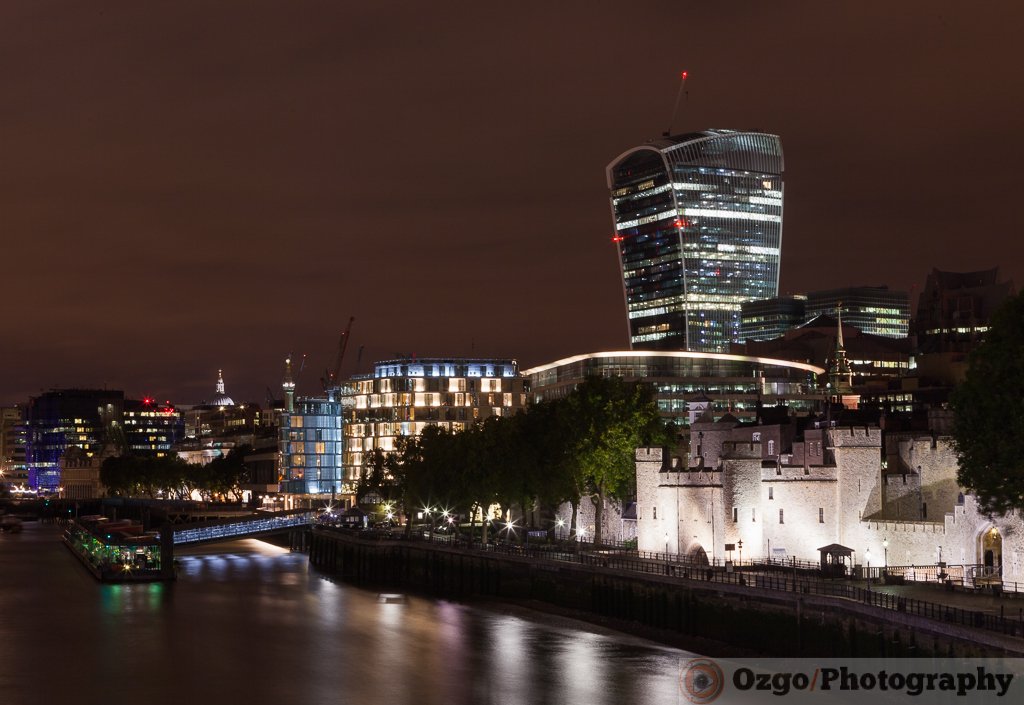
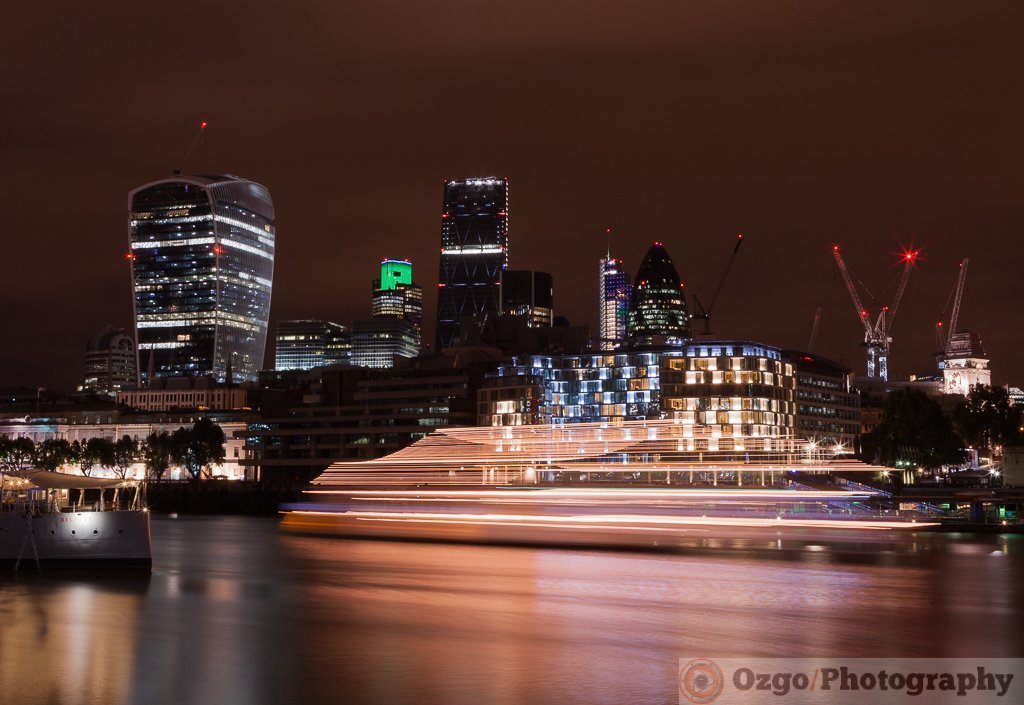
The last photo I took that night was the London’s skyline which included the Walkie Talkie Building and the Gherkin but what I think is making the photo better is the light trail of a ship sailing away.
What do you think?


You must be logged in to post a comment.
Leave a comment